Here's a young man, who builds some pretty cool projects. Just the kind of stuff, I always dreamed up, when I was a kid. But, never got to build, most of them. Aside from some wooden Coaster Carts. With Lawn Mower and Bicycle Wheels. I drove Screw Drivers into 2x4's for Axles. Sure, I started out with Bolts, Nuts and Lock Washers. But, the kept coming out of the Wood. So, one day. I tried a quick (Pit Stop Fix). And the Screw Driver Axel was Born;) Well, then, there was the time I put a Gas Edger Motor on a Bicycle. It was really fast going down the hill. But, it couldn't make it back up the hill. Without some help... The darn drive belt, kept slipping. The Edger had originally been built with a belt to drive the Cutting Blade. I wanted to use a Bike Chain. But, I didn't have the right parts, do do it. And like I usually started my projects, with a Pile of collected parts and then said... I bet I could build something cool with this stuff... Check out Projects. They are really creative and show good craftsmanship...
Don
Don
March 25, 2013
Electric Tricycle
So I built another electric vehicle. This time around, I actually did some designing before I got any parts, so this was less of a "what do I do with this cool part" project than most of the things I build are. However, the actual construction of the vehicle was started due to the acquisition of a cool part: the "melon" sized brushless motor that drives the tricycle. Getting the motor was a great excuse to implement a bunch of ideas for an electric vehicle I developed after building my electric scooter.
This was my first big project done with access to real machine tools (courtesy of MITERS), so this was both my learn how to machine things and learn how to Solidworks project. Even with just a semester working with these tools, I was able to make this vehicle significantly more refined (while simultaneously even more ridiculous) than my scooter.
The design for the vehicle was inspired by the classic Radio Flyer tricycle. That vehicle geometry is not exactly intended for the high speed go-kart like performance I wanted, so I tried to optimize the design while retaining the tiny kids-trike aesthetic.
And now, a brief overview of the tricycle's specifications:
Motor: Turnigy C80100-130 brushless RC outrunner
Controller: Kelly KBS48121 120A peak BLDC controller
Batteries: 39.6V 7.5 Ah A123 Systems Lithium Nanophosphate pack
Drivetrain: Manual 8-Speed Shimano internal gear hub, custom spur gear differential
Chassis: Welded steel tubing and aluminum plate construction with side-to-side leaning
Top Speed: 45+ mph, if you're feeling brave

More pictures, videos, and build log can be found after the break.
The tricycle's build log can be found here (in reverse chronological order) or below:
The basic systems of the tricycle work as follows:
Hidden beneath the black cover near the back left wheel is 300 Watt-hour battery pack built from 36 A123 26650 cells. This pack feeds a Kelly KBS48121 controller, capable of outputting over 4 kW peak, controlled by a twist-grip throttle. This in turn controls a Turnigy C80100-130 brushless DC motor. The output from the motor (after a chain reduction) turns a 8-Speed Shimano internal gear hub, which can be shifted with a trigger-shifter on the handlebars The output from the gearbox, after a second chain reduction, turns a spur gear differential, splitting the torque between the two rear wheels. If you for some reason want to stop, a brake lever on the handlebars can actuate disk brakes on each rear wheel. Steering is accomplished very similarly to a bicycle or motorcycle. In addition to the handlebars turning the front wheel, the front half of the trike's frame also tilts side to side. The tilting motion allows for fast, stable turns, which would not be possible if the frame were rigid.
Read More...
http://build-its.blogspot.com/2013/03/electric-tricycle.html
July 5, 2012
All-Terrain Electric Scooter
But first, a brief overview of the scooter's specs:
Motors: 3x CIM motors
Batteries: 8x Turnigy 5000 mAh 4s LiPo packs, 16s2p configuration (59.2V, 10 Ah)
Controller: Kelly KDS72200E, 72V, 120 A continuous, 200A peak
Wheels: 12.5" with knobby pneumatic tires
Deck: Hand laminated carbon fiber with polycarbonate top
Frame: Royce Union Transit kick scooter, with about 200% more aluminum added
Brake: Pedal actuated rear disk (sprocket) brake
Videos are at the bottom of the post.

At the beginning of this past school year, my school's robotics team decided to finally dismantle some old FRC robots that had been collecting dust for six or seven years. Since we now compete in VEX, not FIRST, we had no use for all the parts we stripped off the robots. Therefore, I generously relieved the team of some of these parts, including six Victor 884's, six CIM motors (4x 2.5", 2x 3"), 2 AndyMark Toughbox gearboxes, some #35 roller chain, and assortment of sprockets, some steel shafts and shaft collars, a 1/4" by 4" by 3' aluminum plate, 1" aluminum U channel, 1/8" polycarbonate sheet.... Anyways, while looking up the CIM motor curves, and trying to figure out by how much I could over-volt them, I ran into this, which at one point used a pair of CIM motors. That vehicle then led me to these. By an interesting coincidence, only a few weeks after I discovered those vehicles, I went to the Atlanta Mini Maker Faire, and guess what I saw there. After seeing the vehicles in action, I had to have one of my own, and thus my scooter was born.
I started on the actual construction of project part way through my second term senior year, and have continued it into the summer. It is still a work in progress, and updates will be posted HERE. Also, I plan on taking it up to Boston with me for school next year, where it will be my first (and probably not last) entry to the MIT branch of the "Collegiate Silly Vehicle League."
The scooter started out as my old kick scooter, a Royce Union Transit, which was a small step above the classic Razor scooters in terms of quality - for instance, it has front and rear wheel suspension that uses actual springs and shock absorbers rather than rubber blocks, and it has a more elegant folding mechanism.
Scooter:

Front suspension. The actual spring and shock absorber are hidden withing the steering column:

Rear suspension:

For use on softer and less regular terrains than asphalt, the original wheels needed to go. I got new ones from Norther Tool. They sell a version with a 60t sprocket included, but I managed to scavenge a 60t sprocket with the same bolt hole pattern from school. The best part of these wheels is that I can later upgrade the tires to these epic snowblower tires if I want to use the scooter in snow:

To accommodate the larger wheels, I built a completely new fork and rear suspension assembly out of aluminum. I found some cheap mountain bike shock absorbers on ebay, and bought two with 1500 lb/in springs. Here they are next to the scooter's original rear shock absorber:

I made the rear swingarm of 1/4" x 4", 1/4" by 2", 1" angle, and 1" U channel aluminum, plus an assortment of nuts and bolts:

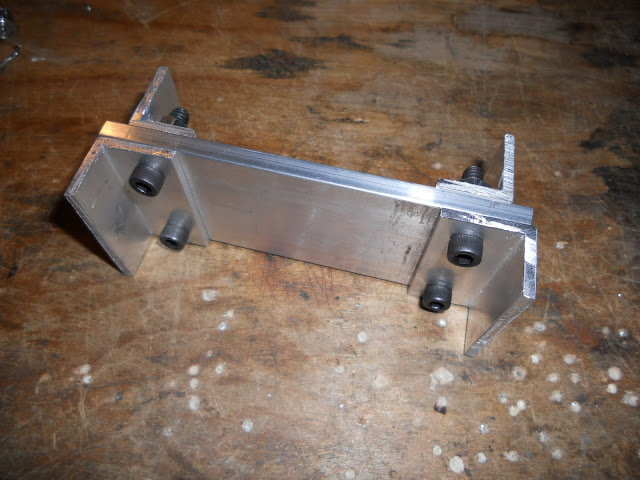


Yes, I know one side is longer than the other one.
For the new fork, I started out by tearing apart the fork from an old mountain bike. Fortunately, the scooter used a 1" threaded headset, which I was easily able to replace with the mountain bike's 1" threadless headset.

Using the MTB fork's springs, damper, some steel tube and solid rod, and U aluminum, I built two new shock absorbers:


These were then bolted to some more aluminum and the fork crown, to make a leading link suspension arm:

I cut dropouts in the aluminum, so the wheel could be removed easily. I cut horizontal dropouts in the rear suspension arm:

I sued a 1/2" threaded rod for the axle, but the I.D. of the wheel's bearings was 5/8". To make up for the difference, I filed down some 1/2" nuts, so the fit inside the wheel bearings:


To test handling, I pretended it was still a normal kick scooter, and pushed it around my driveway a bit:

Read More...
http://build-its.blogspot.com/2012/07/all-terrain-electric-scooter.html
Project List


Go there...
http://build-its.blogspot.com/p/project-list.html
Electric Tricycle - All-Terrain Electric Scooter and more Cool Projects by Ben Katz
- Electric tricycle build log is like hacker crack
- BuildIts: Electric Tricycle
- Electric Tricycle: Early Morning Shenanigans - YouTube
- All-terrain electric scooter build
- BuildIts: All-Terrain Electric Scooter
- BuildIts
- BuildIts in Progress
- BuildIts: Project List
- BuildIts: Programming
- BuildIts: Art
- Electric Scooter Helmet Cam - YouTube
- Electric Scooter 2nd Test - YouTube
No comments:
Post a Comment